Step 1: Login to the platform with the given credentials.
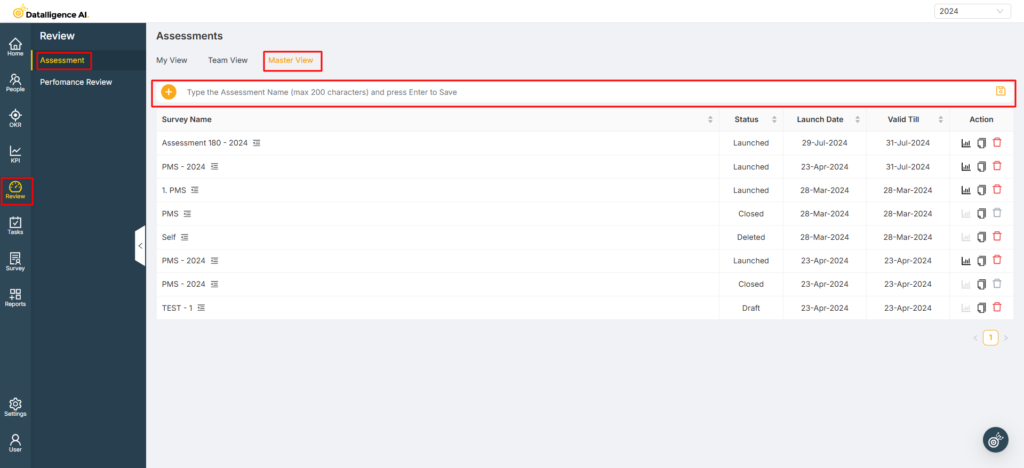
Step 2: Click on “Settings” module to open a submenu.
Step 3: Within the submodule, click on “Assessment”. Enter the title of the assessment and press Enter or click the Save button to open the assessment creation drawer.
Step 4: Choose the response type: Pulse, 180, or 360.
Pulse: Single-level rating.
180: Includes ratings from self and manager.
360: Five-level rating, covering self, manager, peer, other managers, and direct reports.
Raters Before Self: If set to “Restrict”, the manager can only provide their rating after the employee has completed their self-rating. If set to “Allow”, the manager can rate without restriction
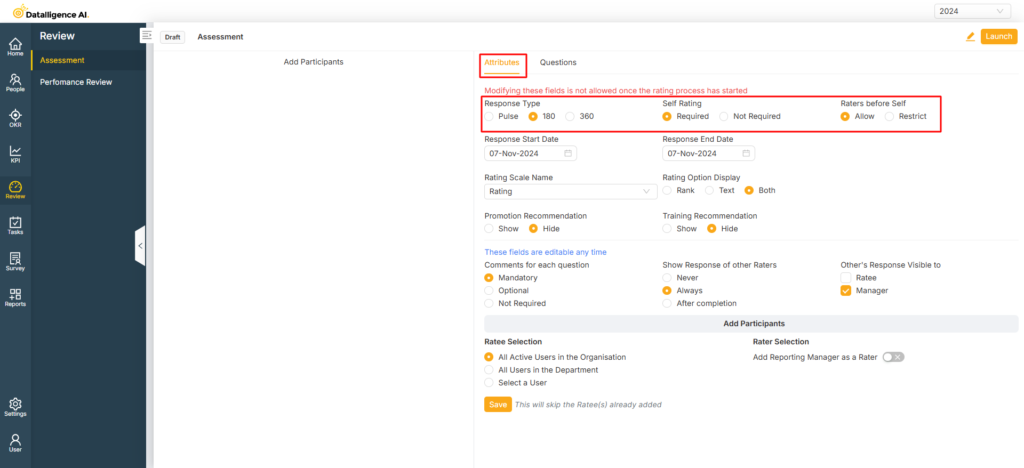
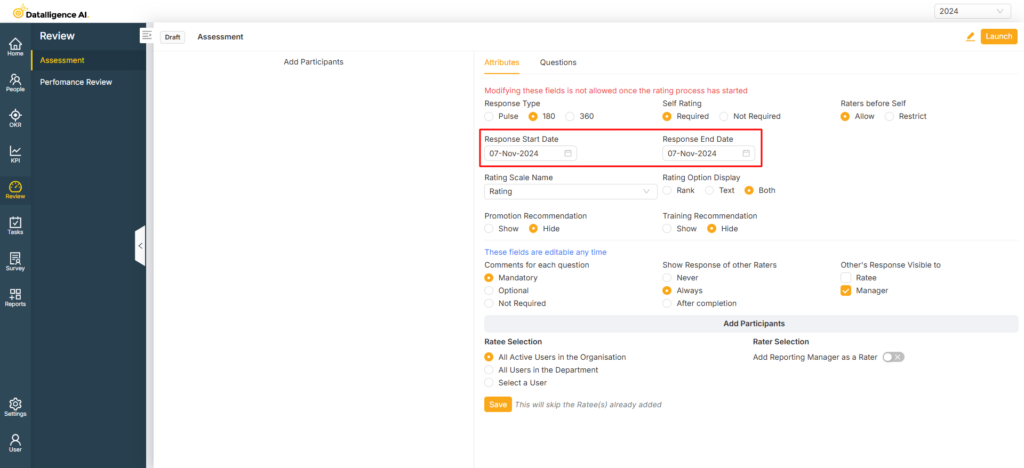
Step 5: Next, select the start and end dates for the assessment.
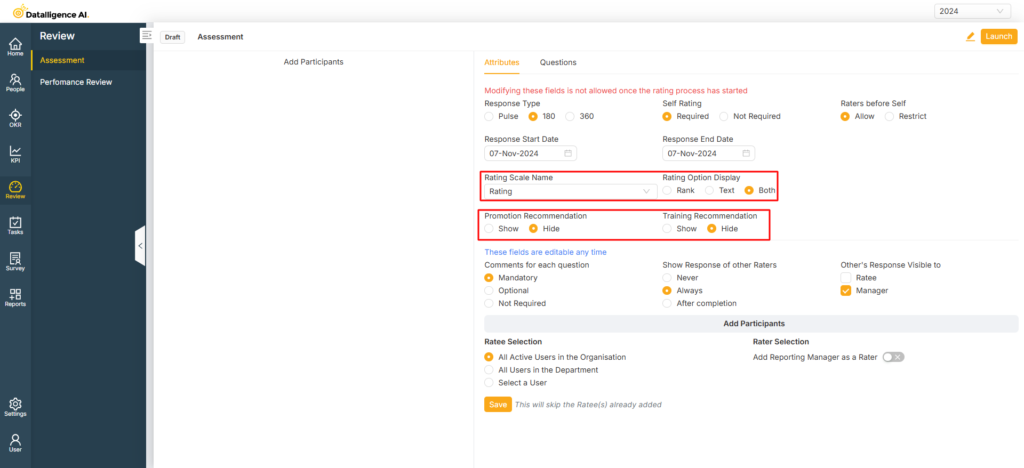
Step 6: Select the “Rating Scale Name” from the dropdown. To create a rating scale, refer to the Rating Scale Configuration.
Rating Option Display: Choose how the rating scale options should be displayed—either as a Rank, Text, or Both. This setting will reflect on the response page when performing the assessment.
Promotion | Training Recommendation: If you click “Show”, it will display in the team assessment, allowing the manager to fill in the details for the person they are evaluating. If you click “Hide”, it will not be displayed in the manager’s team assessment.
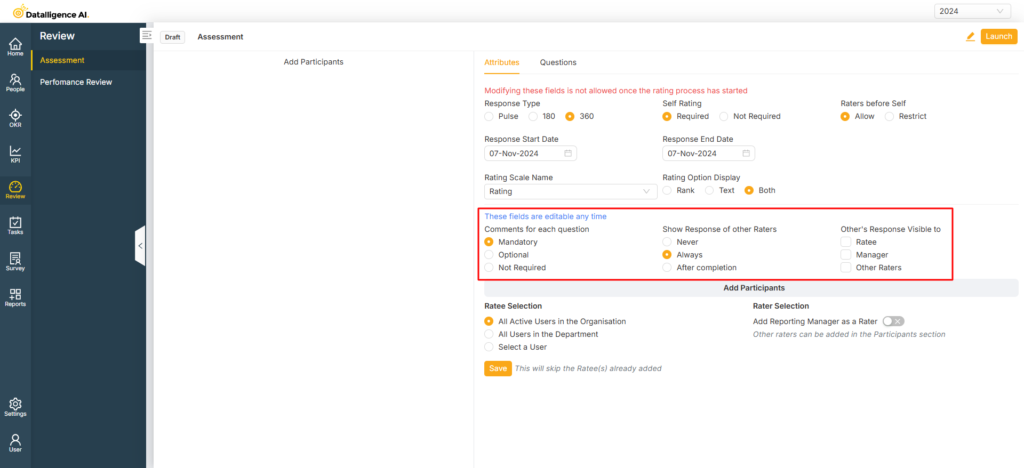
Step 7: Comments for each question: You can set comments as mandatory, optional, or not required.
Show Response of other Raters: Choose when responses should be visible – Never, Always, or After completion.
Other’s Response Visible to: Specify who can view the responses – Employee, Manager, or Others.
Step 8: Ratee Selection:
All Active Users in the Organisation: This option will add all active participants in the assessment when you click Submit.
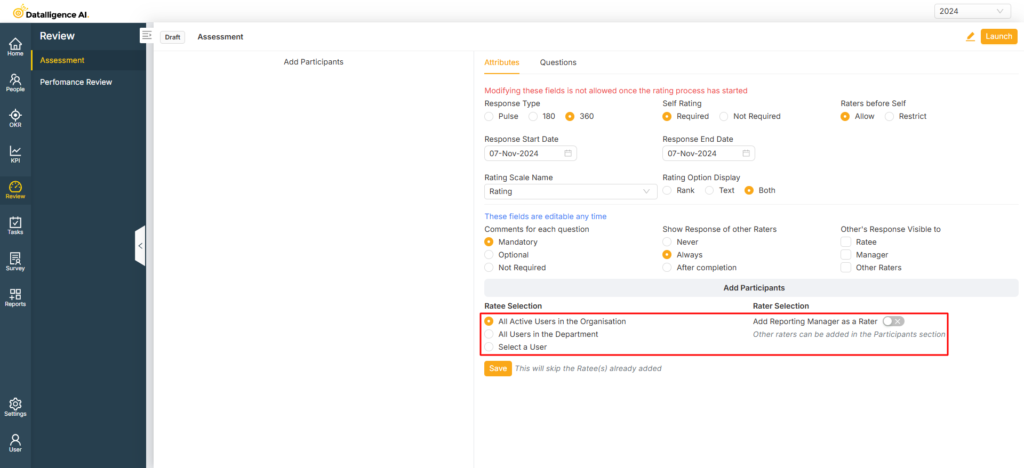
All Users in the Department: It will prompt you to select a department. Once selected, only the members of that specific department will be added as participants.
Add Reporting Manager as a Rater: By toggling this button, the assigned line manager will be added automatically as a rater. Finally, click the “Submit” button to add a participant.
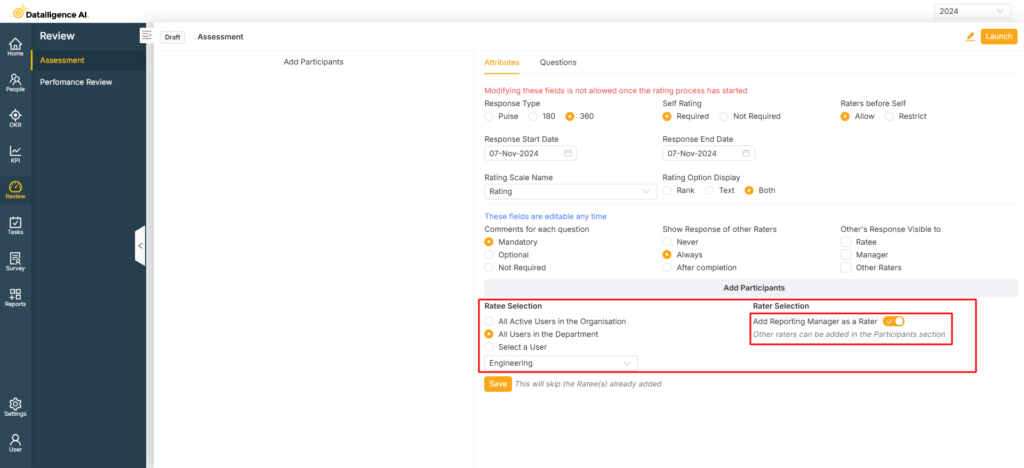
Select a User: This option allows you to add users individually, one by one
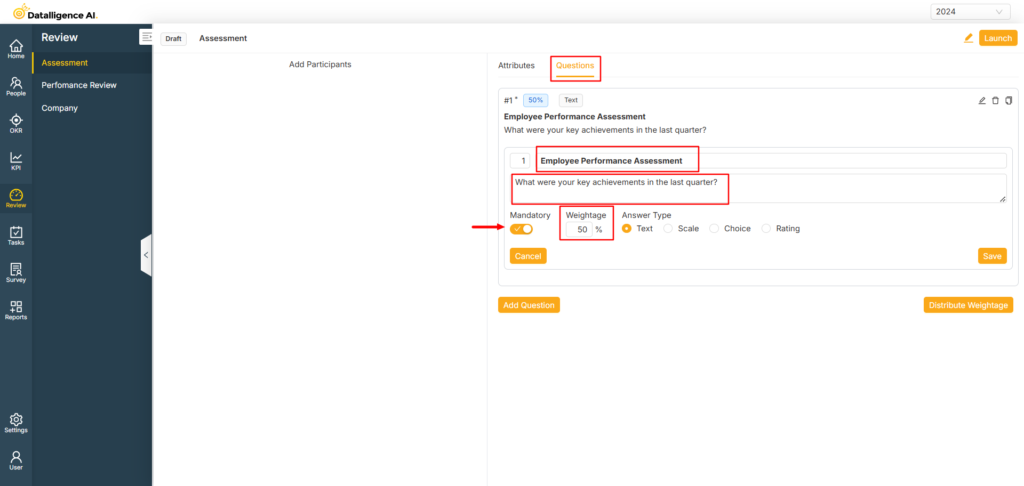
Step 9: In the Question section, set up your questions by entering the question title and the question itself. If you want to make the question mandatory, toggle the button. You can also set the weightage for the question.
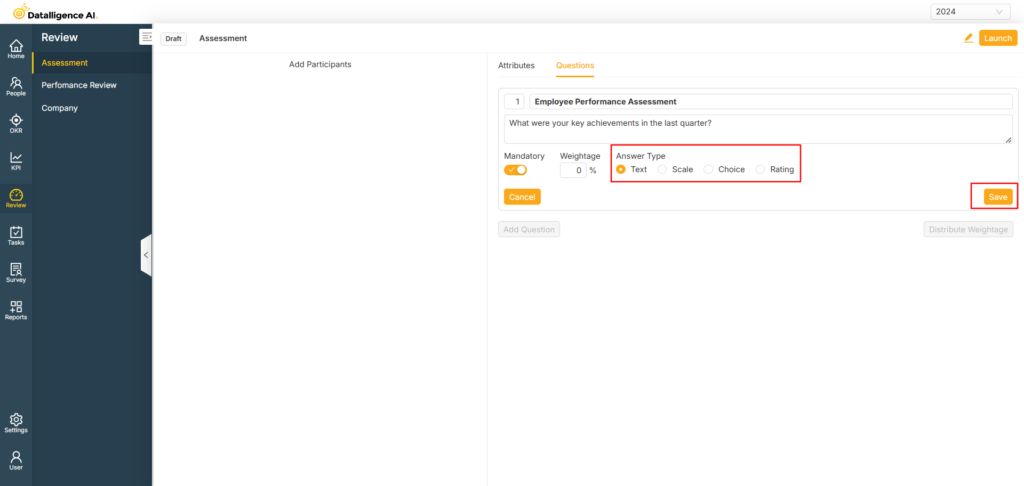
Step 10: The available question types are Text, Scale, Choice, and Rating—select the appropriate type accordingly. Once you’ve set up the question, click the Save button to create it.
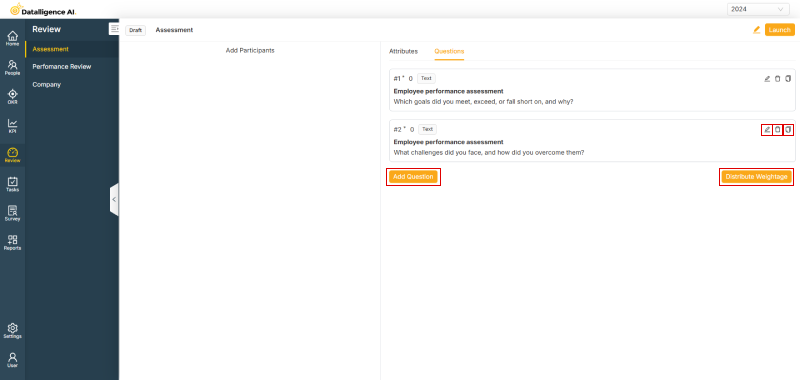
Step 11: To add a new question, click the “Add Question” button. If you need to edit a question, click the Edit icon, make the necessary changes, and save it. You can also delete or duplicate questions as needed.
If you want to distribute the weightage simply click the “Distribute weightage” button.
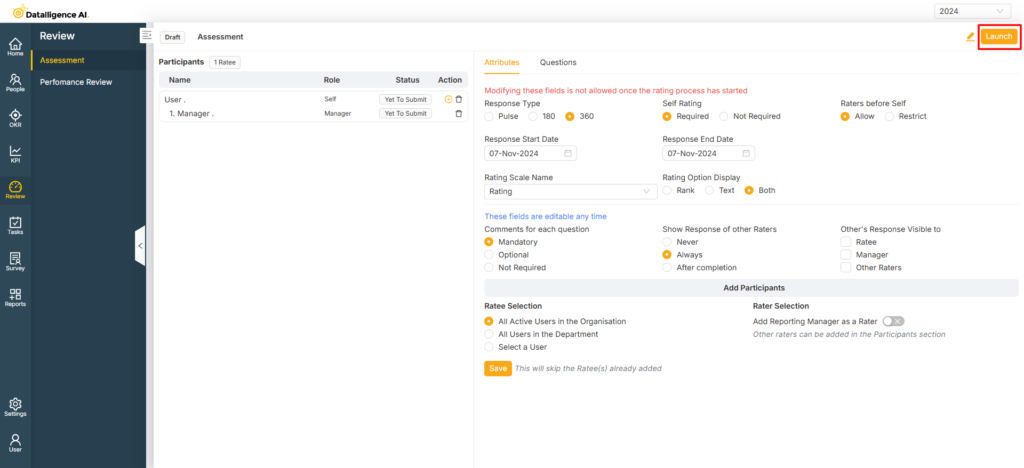
Step 12: After setting up the attributes and questions click the “launch” button to launch the assessment.
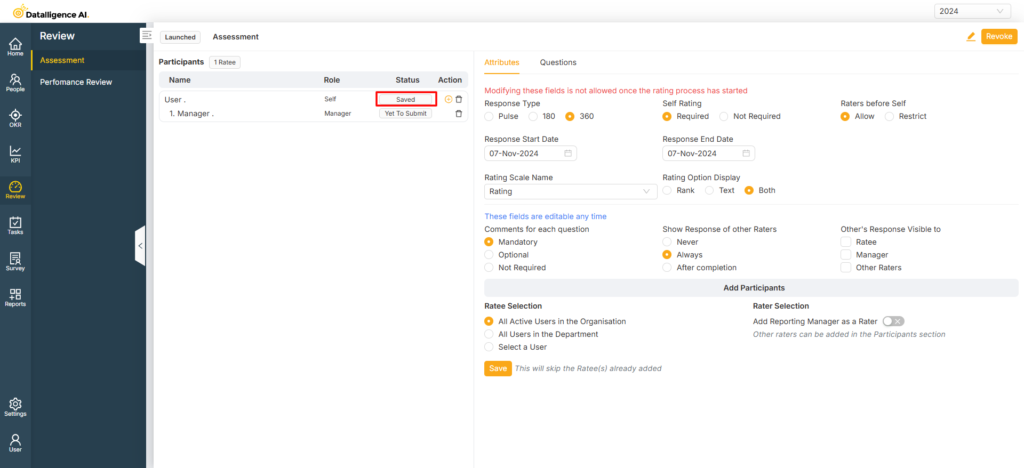
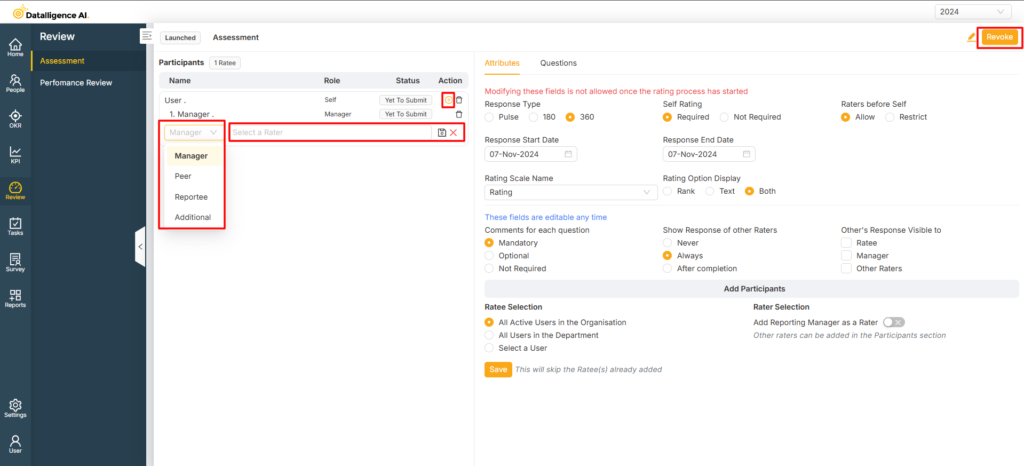
Step 13: If you want to add a participant click the add participant icon then select the role and rater accordingly. Finally, click the save button to add.If you want to revoke the assessment click “Revoke” button.
Step 14: Once the employee completes the assessment, its status will change to Completed. If you wish to revert the status, click the Restore icon.
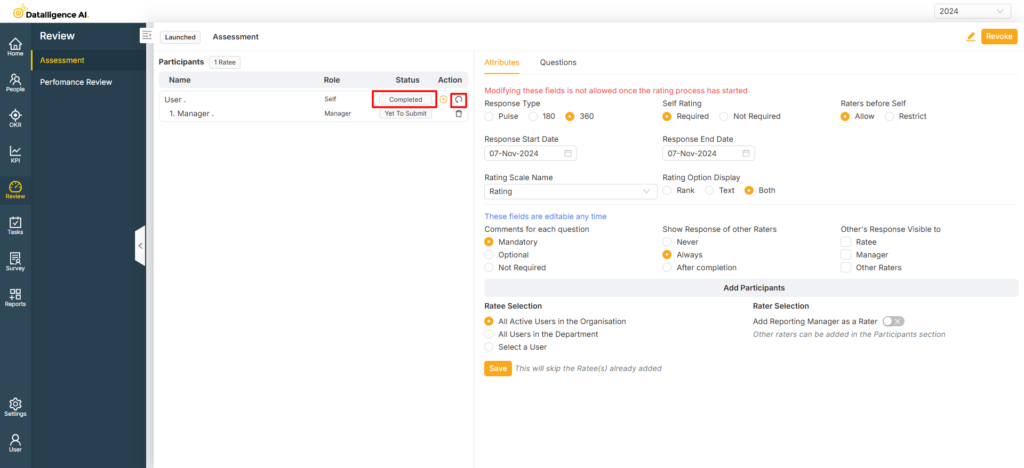
Once the response is reverted, the status will change from “Completed” to “Saved“.