Step 1: To access the Main menu, look for the vertical list of options on the left side of the page.
Step 2: Click on “Survey” to open a submenu with a list of options.
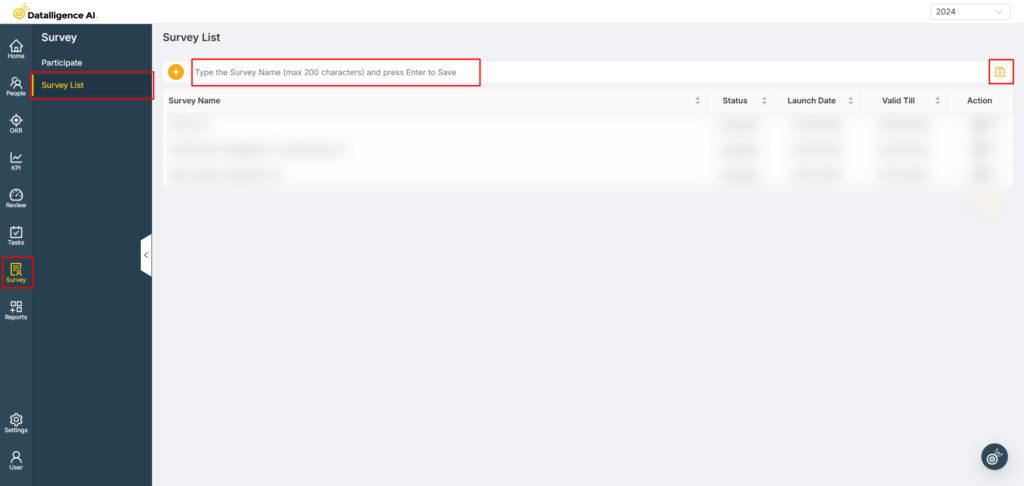
Step 3: Simply click on the menu option “Survey list”.
Step 4: Enter the title of the Survey and press Enter or click the Save button to open the survey creation drawer.
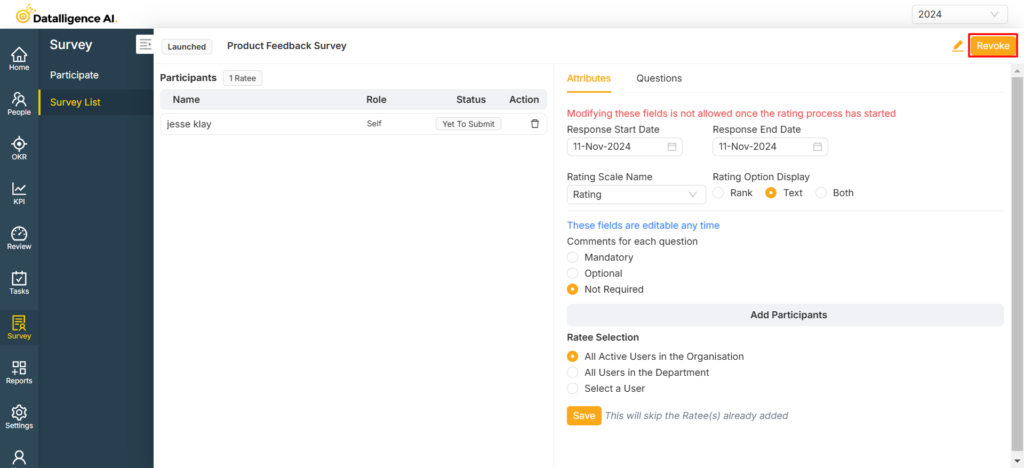
Step 5: Next, select the start and end dates for the survey.
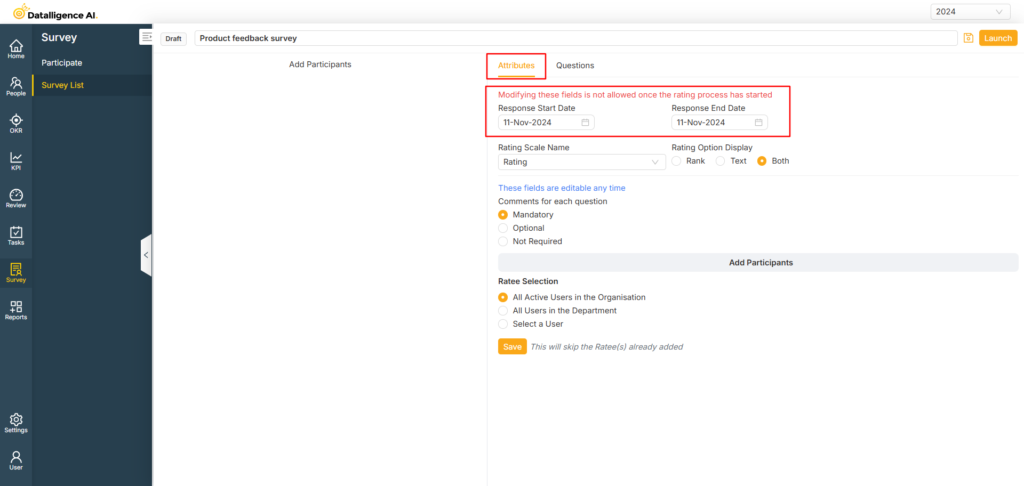
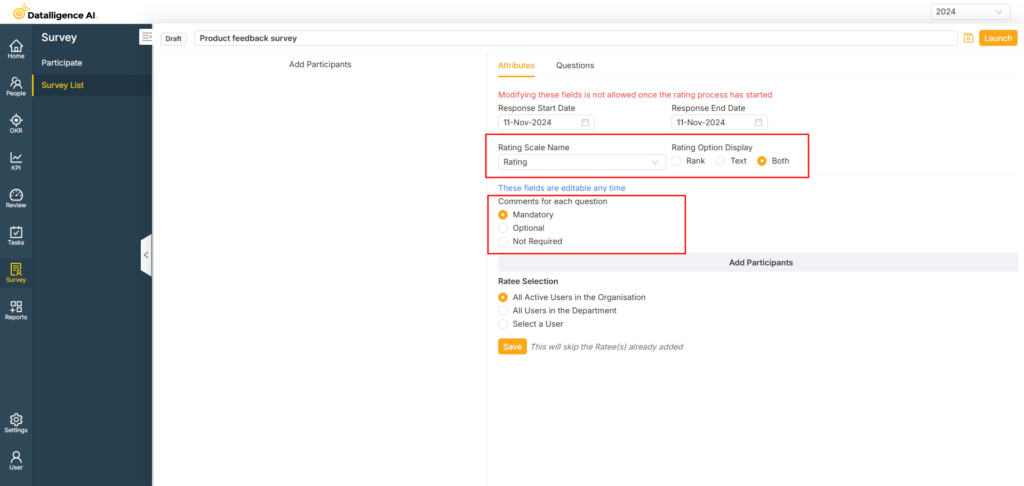
Step 6: Select the “Rating Scale Name” from the dropdown. To create a rating scale, refer to the Rating Scale Configuration.
Step 7: Comments for each question: You can set comments as mandatory, optional, or not required.
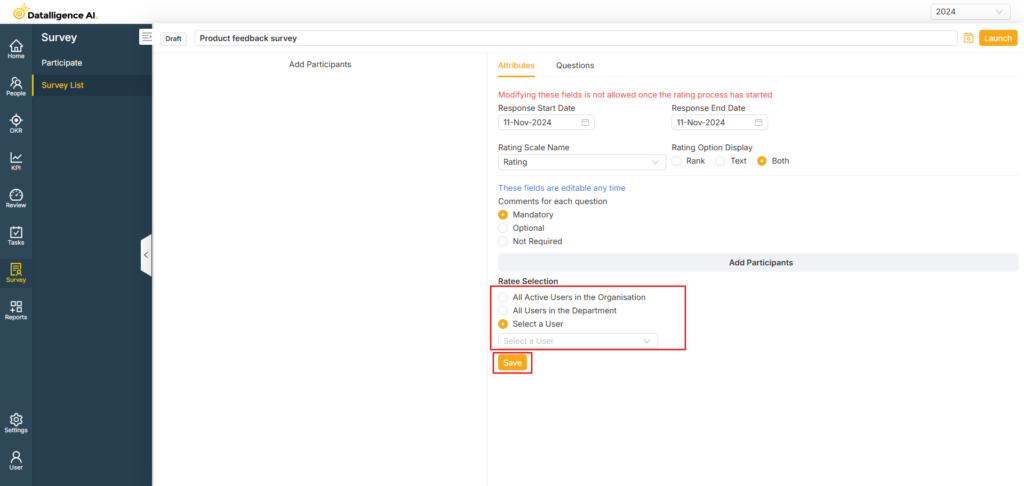
Step 8: Ratee Selection:
All Active Users in the Organisation: This option will add all active participants in the survey when you click Save.
All Users in the Department: It will prompt you to select a department. Once selected, only the members of that specific department will be added as participants.
Select a User: This option allows you to add users individually, one by one
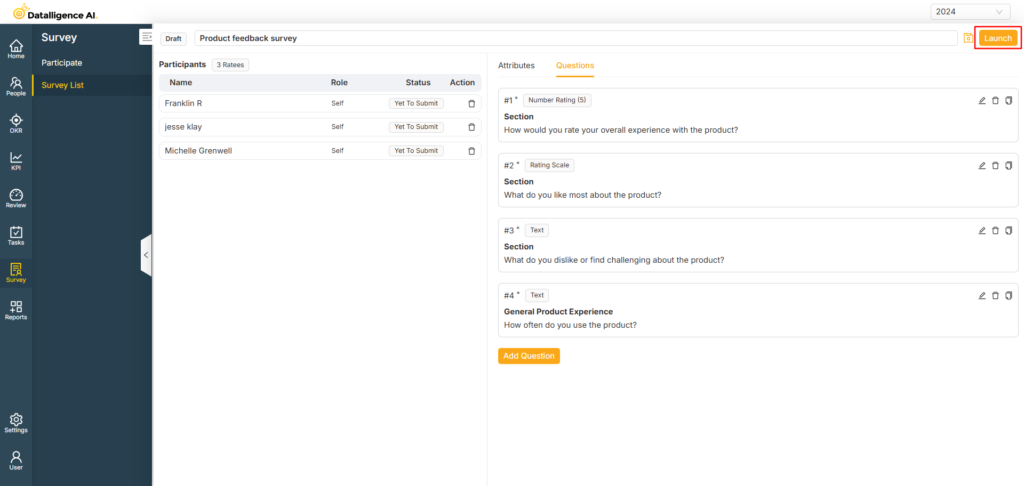
Step 9: In the Question section, set up your questions by entering the question title and the question itself. If you want to make the question mandatory, toggle the button.
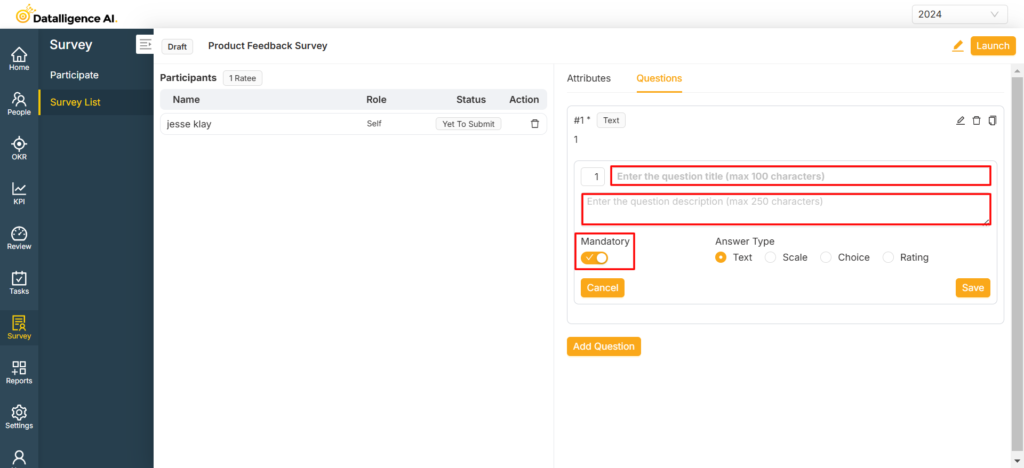
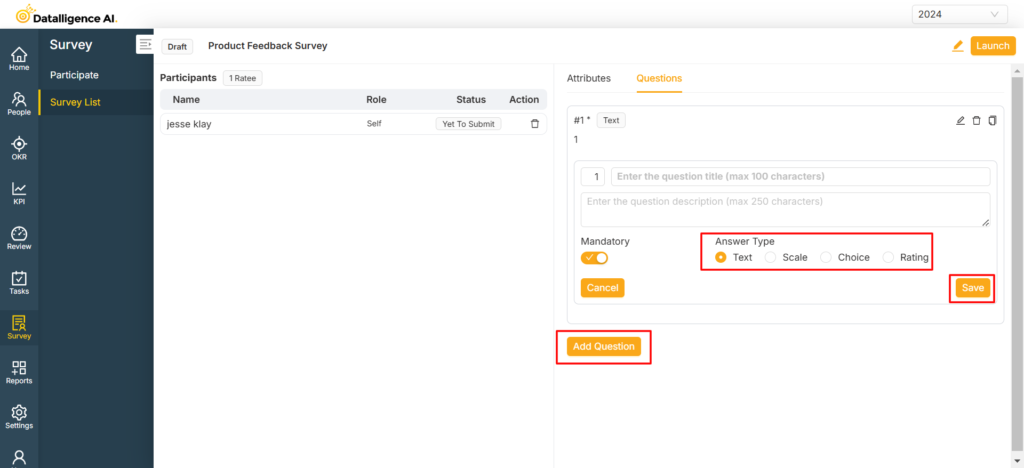
Step 10: The available question types are Text, Scale, Choice, and Rating—select the appropriate type accordingly. Once you’ve set up the question, click the Save button to create it.
To add a new question, click the “Add Question” button.
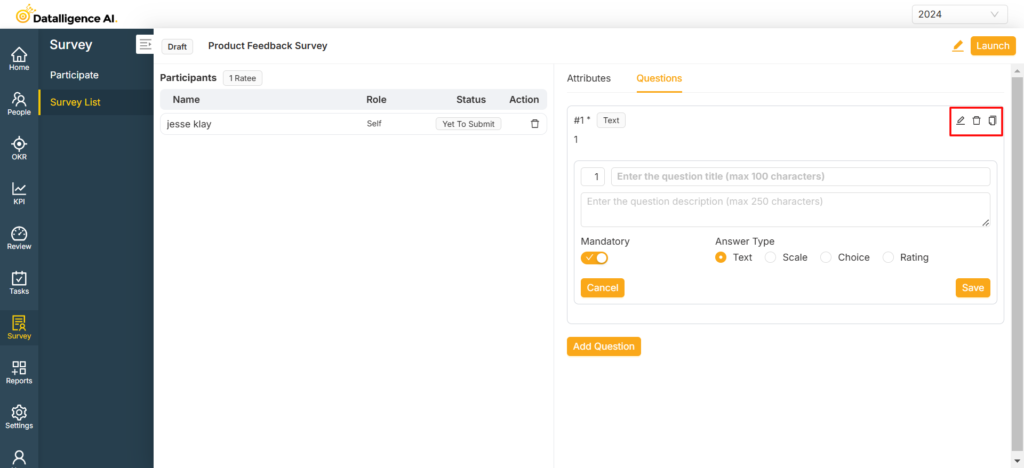
Step 9: If you need to edit a question, click the Edit icon, make the necessary changes, and save it. You can also delete or duplicate questions as needed.
Step 11: After setting up the attributes and questions click the “launch” button to launch the survey.
Step 12: If you want to revoke the assessment click the “Revoke” button.
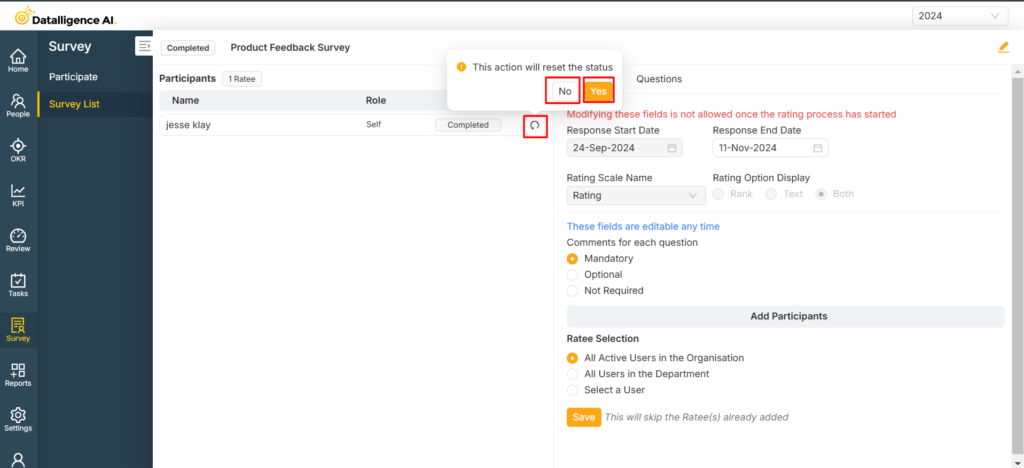
Step 13: After the employee completes the survey, its status will update to Completed. To revert the status, click the Restore icon and select Yes to confirm or No to cancel.